by: Ed Goldberg
URL: http://localhost/gotoPointA.jsp?dest=2_4gold
|
Last month, in Mass Modeling the Autodesk Architectural Desktop Way, we looked at the Mass Elements and Mass Groups functionality in Autodesk® Architectural Desktop Release 3. These tools help you quickly build 3D models. This month we'll explore the undocumented MASSELEMENT > CONVERT command and how it can help you even more. (This command is not supported by Autodesk, so use it at your own discretion.) ACIS
Solid Models The ACIS kernel consists of routines for creating and editing solid models that mimic the real-world behaviors of solid objects. These routines include primitives such as box, sphere, and so on, which are similar to the Mass Element primitives. The difference is that with the ACIS routines you can edit down to the face level of an object. Let's work through the following exercise to see how you can create Mass Elements from ACIS models and then convert the Mass Elements into walls. Creating
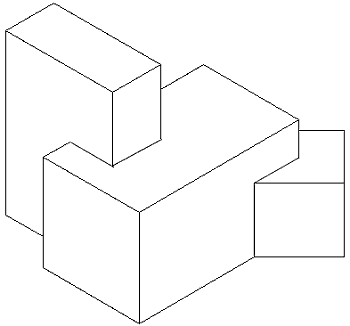
a Solid Model 2. Activate the Solids, Solids Editing, and View toolbars by right-clicking any AutoCAD®-specific icon, and selecting these toolbars from the resulting contextual menu. 3. Select the Mass-Group Layout tab and set the left viewport to Top View. 4. Using the Rectangle command, place three rectangles sized as shown in Figure 1. 5. Select the Extrude icon from the Solids toolbar, and extrude the following measurements as shown in Figure 2. You have now created a solid object.
|

|
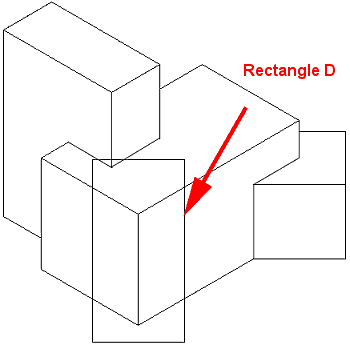
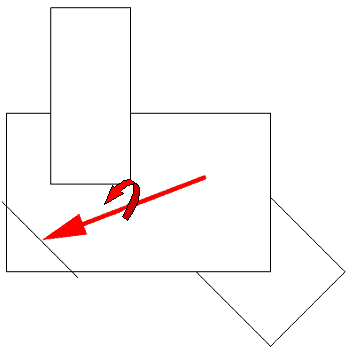
6. Again using the Rectangle command, add a new rectangle to the object you have just created (see Figures 3 and 4).
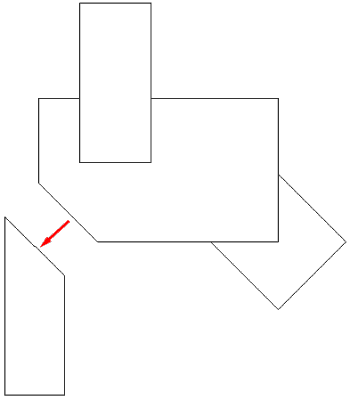
7. Select the Slice command from the Solids Editing toolbar, and select the solid made from rectangle A, then select O (Object) from the command line. 8. Select rectangle D as the O (Object), and type B at the command line to keep both sides. You have now created a new solid object (see Figure 5).
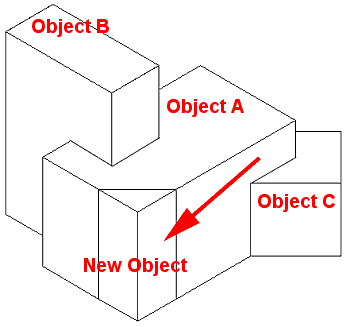
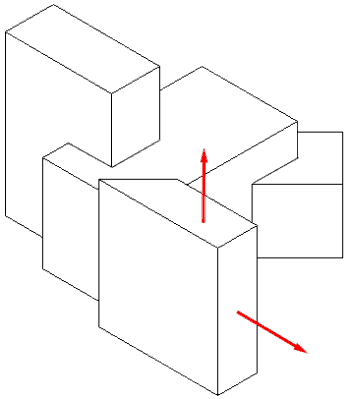
9. Select Extrude Faces from the Solids Editing toolbar, and extrude the new object faces 10' higher, and 25' outward. Then move the new figure 10' away from Object A as shown in Figures 6 and 7.
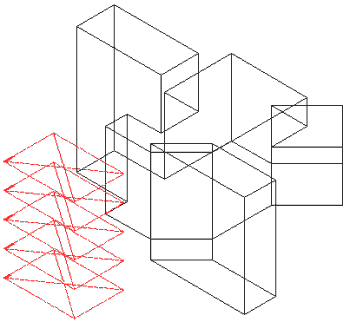
You have now completed your massing model using the ACIS solid-modeling kernel. 10. Type masselement at the command line and press Enter. 11.Type C, for convert, on the command line and press Enter. 12. Select each of the objects and name them A, B, C, and D respectively, erasing their layout geometry when prompted by the command line. You have now created Mass Elements, which can be modified as shown in last month's column. |
|
Mass
Groups 14. Add the Mass Group object in the viewport (the rotation angle doesn't matter) and press Enter. 15. Select the Mass Group object and right-click to bring up the contextual menu. 16. Select Attach Elements, and select the Mass Elements you created earlier. 17. Select the Layers icon, and freeze the A-Mass layer to leave the Mass Group. 18. Select Concept> Slice Floorplates> Generate Slice from the main toolbar. 19. Enter 5 (for 5 slices) at the command line and press Enter. 20. Select two corners for the Slice Object indicator, and accept 0.00 as the rotation angle. Accept 0" for the starting height, and make the distance between slices 10'. (See Figure 8.)
21. Select all the Slice Object indicators and then right-click. 22. Select Attach Objects from the contextual menu that appears and select all the Mass objects. You have now sliced your Mass Object into floorplates. 23. Select the Layers icon, and freeze the A-Mass Grps layer to leave just the floor slices. 24. Select Concept> Space Boundaries> Convert to Boundaries from the main toolbar. 25. Type SL for Slice at the command line, press Enter, select all the slices, and press Enter again to bring up the Space Boundary Properties dialog box. 26. At the Space Boundary Properties dialog box, choose the Design tab, and change the wall base height to 10'. Click the OK button and then press Enter to close the command. You have now gone from the conceptual stage of your design to the Space Boundary stage where you can generate walls and add doors and windows. (See Figure 9.)
Conclusion |

H. Edward Goldberg, AIA, is a practicing architect and industrial designer, as well as Coordinator of Industrial Design at Towson University in Towson, Maryland. Ed can be reached at h.e.goldberg@verizon.net.