by: Elise Moss
URL: http://localhost/gotoPointA.jsp?dest=2_1mossfly
|
At every Autodesk® Architectural Desktop demo I've attended, it's those cool fly-through videos that generate the most interest. Fly-throughs are fun and a great way to get client feedback very early in the design process, saving you significant time and money. The latest release of the software makes it easier than ever to create a fly-through after you've created and saved your model. It's this simple:
The first step involves creating a spline that will act as the camera path. You may need to move the spline up in the z direction to keep the camera off the floor.
Enable the Camera toolbar (View >Toolbars) and select the Add Camera tool to place the camera along the spline.
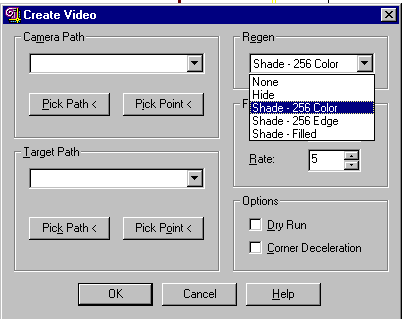
From the Camera toolbar, invoke the Create Video command. When prompted to select a camera, select the camera you've already placed in the drawing.
Before running the camera, use the Regen option in the Create Video dialog box to see how your model will appear in the fly-through. For example, selecting Hide eliminates hidden lines and so on. The camera sees what you see, so experiment with different Regen modes to get the appearance you like best. While still in Create Video dialog box, under Camera Path, click the Pick Path button and then select the spline you created earlier. A pop-up appears asking that you name the camera path. In this example, name the path: Stairs. Click OK.
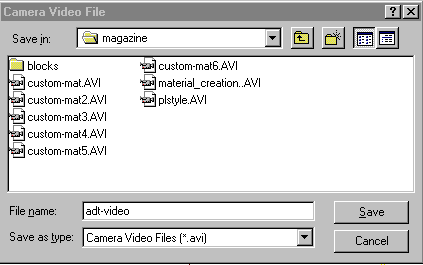
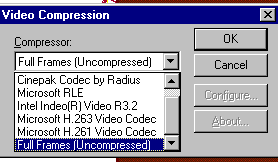
The Camera Video File dialog box now appears. Name the file and save it as an AVI. The camera will move along the path and the following dialog box appears.
You have several choices for how you can create and store the AVI file. In this case, select Full Frames (Uncompressed) mode. Click OK. It may take several minutes for the AVI file to be created depending on the length of your camera path. You are then prompted to view the video. Review the video and experiment with different paths and values to see different results. Make your choices and then run that cool fly-through for your clients. |
Elise Moss is the current President of SVAPU (Silicon Valley AutoCAD Power Users) and owner of Moss Designs, a Registered Autodesk Developer of custom CAD solutions. She is also a professor at the Applied Technology Division at De Anza College, and has a degree in Mechanical Design from SJSU. She is married to Philippe Stassart, a contractor at NASA Ames, and has two sons. Benjamin is a UNIX systems technician at Hewlett-Packard and Daniel is currently enlisted as a private in the United States Marine Corp.


