by: Ed Goldberg
URL: http://localhost/gotoPointA.jsp?dest=2_12gold
|
This month I'm not presenting a tutorial so that I can share some interesting Autodesk® Architectural Desktop Release 3.0/3.3 productivity hints with everyone. Speeding
Up PAN, ZOOM, and ORBIT 1. Start Autodesk Architectural Desktop 3 or 3.3. 2. Select File > New from the main toolbar to bring up the Create New Drawing dialog box. 3. In this dialog box, double-click on Aec arch [imperial-intl].dwt in the Select a Template drop-down list to start a new drawing session. We'll use this session to enter the new settings. 4. Right-click in any viewport to bring up the Options dialog box. 5. Select the Systems tab. 6. Under Current 3D Graphics Display, select Properties, which opens the 3D Graphics System Configuration dialog box. 7. In this dialog box (see Figure 1):
8. Click the Apply & Close button to return to the Options dialog box. 9. Click the OK button to close all dialog boxes and to save the settings. These settings speed up the execution of all ORBIT and ZOOM commands (especially the dynamic zoom/pan) that are implemented via Command line or tool button. They do not seem to speed up the mouse-wheel zoom and pan operations, which may be a limitation of mouse drivers... the Autodesk Architectural Desktop programmers are looking into this one. Activating
Toolbars Quickly 2. Right-click on any empty space in the main toolbar to bring up a shortcut menu. 3. Select AECARCHX (move the cursor to the right), which opens the context-sensitive Toolbar Selection menu (see Figure 2). 4. Select Walls to activate the Walls toolbar. 5. Place the Walls toolbar in a convenient place.
You can use the preceding process to activate any of the AutoCAD® toolbars. Just select ACAD™ in Step 3 above rather than AECARCHX. Another quick way to reach the Toolbar Selection menu is to right-click on any tool icon that is showing. (Right-clicking on an AutoCAD-specific icon brings up the AutoCAD Toolbar Selection menu, and right-clicking on an Autodesk Architectural Desktop-specific icon brings up the Autodesk Architectural Desktop Toolbar Selection menu.) You can also select the Customize option from the shortcut menu that opens in Step 2. Use it to create toolbars containing only the icons you prefer for a specific function. Using
standard AutoCAD TRIM and EXTEND Commands with Autodesk
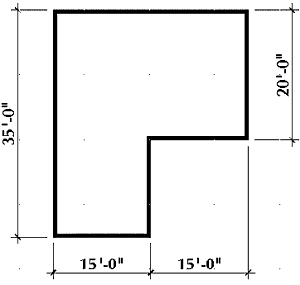
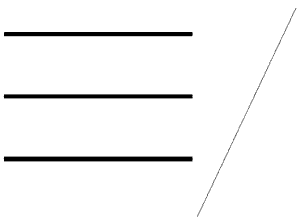
Architectural Desktop WALL Commands 1. Start Autodesk Architectural Desktop 3 or 3.3. 2. Select File > New from the main toolbar, which opens the Create New Drawing dialog box. 3. In this dialog box, double-click on Aec arch [imperial-intl].dwt in the Select a Template drop-down list to start a new drawing session. 4. Select the Model layout tab. 5. Activate the Autodesk Architectural Desktop Walls toolbar and the AutoCAD Draw, Modify, and View toolbars. 6. Dock all the toolbars in convenient places. 7. Select the Add Wall icon from the Walls toolbar to bring up the Add Walls dialog box. 8. Place standard 6"-wide walls as shown in Figure 3.
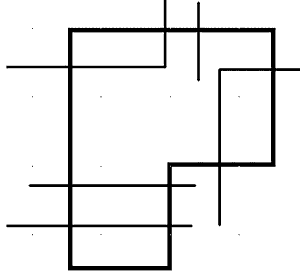
9. Select the Line icon from the Draw toolbar and draw lines similar to those shown in Figure 4.
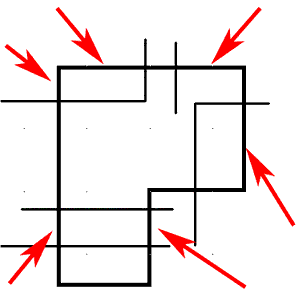
10. Select the Trim icon from the Modify toolbar. When the Command line reads "Select objects," press the Enter key on your keyboard. 11. Select the walls at the places shown in Figure 5.
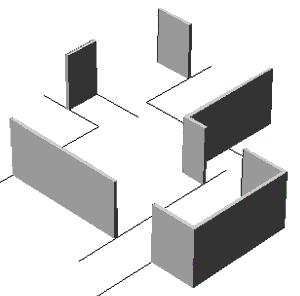
12. Select the SW Isometric View icon from the View toolbar to change the view (see Figure 6).
The walls trim to the standard AutoCAD lines. To use the EXTEND command: 1. Erase the previous exercise. 2. Draw three standard 6"-wide walls and a line as shown in Figure 7.
3. Select the Extend icon from the Modify toolbar. 4. When the Command line reads "Select objects," press the Enter key on your keyboard. 5. Select all three walls near the ends that face the line. The walls extend to the line. 6. Select the SE Isometric View icon from the View toolbar to change the view (see Figure 8).
The walls extend to the standard AutoCAD line. Add these easy-to-implement productivity gains to your toolbox. As you become more proficient with Autodesk Architectural Desktop 3.3, you're sure to find some productivity shortcuts of your own. If you want to share them, send me the details, and I will try to publish them for others to use. |
)
)

H. Edward Goldberg, AIA, is a practicing architect and industrial designer, as well as Coordinator of Industrial Design at Towson University in Towson, Maryland. Ed can be reached at h.e.goldberg@verizon.net.